Been quite awhile but about to get this blog shaking again....gonna post all kinds of fun crafty projects int he next few weeks.
Can't wait to get going again.
Gonna start with a mini book using Jenofeve designs templates for the Everlasting album using Hot Off The Press paper collection Serenity, with all the fixin's from Paper Wishes.
I will list where to get all the products I use.
I hope you will like what you see.
Jodi
Monday, September 18, 2017

Thursday, September 10, 2015
MY NORA TRAVELER DR. BAG
The Swoon Nora Dr Bag pattern came be found here
Alicia makes these patterns very easy to follow I hope you try one for yourself I had much fun putting mine together

Monday, March 18, 2013
GOT A LITTLE TOP HAT CRAZY

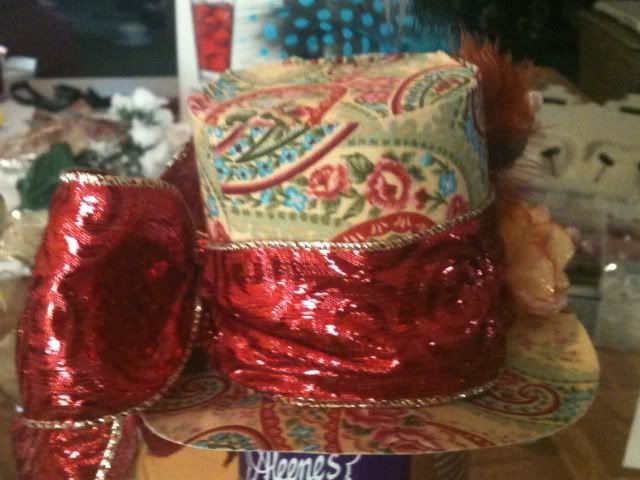
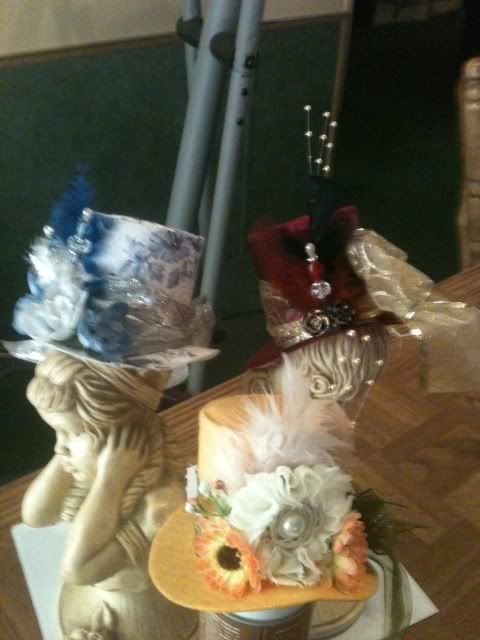 I had so much fun with the first one I spent the whole day saturday making more
Happy Crafting
I had so much fun with the first one I spent the whole day saturday making more
Happy Crafting
Saturday, March 16, 2013
Mini Felt Top Hat
 I used a template from T V K for the top hat pattern and I chose a card stock color that would best match my felt I sprayed adhesive to the back of my card stock and stuck it to my felt I gave the straight edge and extra 1/4 inch of felt so that I could fold it over the edge of the cardstock the first one I made you could see the cardstock edge on the top of the hat and it just looked crappy so I adjusted a bit and it looks like a perfect little hat top I used hot glue to put it all together added some flowers feathers a pearl spray a left over handmade porcelain clay rose to the back a ribbon and just tied the ribbon in a knot at the back and used a bow maker to make a bow and hot glued it to the knot I just didn't want it to come untied. I really like how it turned out even though I didn't over accessorize it and it was just a practice I had two pieces of 8 x 11 felt blue and yellow and now I gotta hit up the dollar store for more because I had a lot of fun making it. You will also find a Youtube video on The Vintage Key's blog showing how to assemble the hat...hope you try one too
Thursday, December 13, 2012
HATBOX IN THE MAKING
My sister recently gave me a round wood cheese box and asked could I do anything with it.....uh.....yeah......so in the process of transforming just thought I'd share a in the middle of it all pic making a ton of flowers takes some time....
 I used Tim Holtz tattered floral and tattered floral garland for flowers


Monday, September 24, 2012
Thank You Card


Sunday, April 22, 2012
ALTERED MINI VASE VINTAGE PIN CUSHION


Sunday, April 15, 2012
ALTERED CANDY TIN VINTAGE PIN CUSHION

I made this from a candy tin some scrap materials lace trim with diamond stickles, black and gold trim layered with pearl string,black and tan feathers and handmade stickpin and handmade cameo made with polymer clay baked colored with spectrum noir marker and thean glossy accents
Saturday, February 25, 2012


Tuesday, November 15, 2011
ALTERED MINI DOMINOS

SUPPLY LIST:
RANGER GLOSSY ACCENTS
RANGER ALCOHOL INKS
STAZ-ON BLACK
RANGER STICKLES
KEY RINGS
LARGE JUMP RINGS
RANGER BLENDING TOOL
RANGER BLENDING SOLUTION
GOLD LEAF PEN
MINI DOMINOS
IMAGE STAMP
HEAT TOOL
DRILL
instructions are the same as the previous domino but instead of using clear coat I glossy accented the front
Pin It
Friday, November 11, 2011
ALTERED MINI DOMINO

My first altered domino...and its a mini ....for a mini album...
SUPPLY LIST:
MINI DOMINO
GOLD GLITTER
SMALL STAMP IMAGE
DREMEL OR DRILL FOR HOLES
First I drilled the hole for hanging with dremel...then inked both sides with alcohol inks
till I liked the way it looked
stamped image with staz-on ink black.
decorated with some stickles
Sprayed both sides with clear coat
and sprinkled a touch of gold glitter while
the clear coat is still wet
let it dry
gold leafed edges
hung from swivel clasp
hope you like the project.
Mine is for a mini book in progress

Friday, October 28, 2011
A CELEBRATION OF LIFE

My brother Rick as I have mentioned before has been diagnosed with cancer and we are holding
a benefit to raise money to assist in paying his medical costs...I realize that
it could be very difficult for some to attend the benefit but if you would like to donate
there is a button to the right and any and all donations are very gratefully appreciated
thank you to my crafting family for the help you have given me in trying to accept
my brothers illness it has not been easy for myself or anyone in my family...
Wednesday, October 19, 2011
PLEASE VOTE FOR ME
Hi everyone there is a contest that I have entered to win a Gypsy....http://cardadayblog.blogspot.com/2011/10/snowflake-card.html
I am #1 on the list and would very much appreciate your vote
I want you all to know ...that if I win this Gypsy it is going to be donated as a raffle prize at a benefit being held for my brother Rick...those close to the family know the details of what is happening right now...
Please know that all of your votes will not only be appreciated but will also help in my brothers fight against cancer.......
thank you all in advance
Jodi Barber
I am #1 on the list and would very much appreciate your vote
I want you all to know ...that if I win this Gypsy it is going to be donated as a raffle prize at a benefit being held for my brother Rick...those close to the family know the details of what is happening right now...
Please know that all of your votes will not only be appreciated but will also help in my brothers fight against cancer.......
thank you all in advance
Jodi Barber
Tuesday, October 11, 2011
YOU'VE BEEN BOO-ED

I started You've Been Boo-ed on my street I had a blast ...
made 5 goodie baskets bought all my stuff at Family Dollar
pumpkin buckets scarecrow and tootsie roll mixed bag of halloween candies and some ghoulish sucker rings
and went out
doorbell ringing almost got caught the next door neighbor came out and discovered
hers just as I was walking out the front door of my house with my son in law..
he came up with something quick said...tell her you got one too...it worked she has no idea it was me
if you want to participate and start "You've Been Boo-ed" in your neighborhood
the website is BEEN BOOED
have lots of fun and Happy Halloween everybody
Wednesday, August 3, 2011
ANNIVERSARY CARD

This card was made using
Lovestruck
Flower Shoppe
Ancestry Imagine cart - flowers
Country Carnival -flowers
scalloped hearts and hearts
spellbinders dies
diamond stickles
glossy accents
cuttlebug quilling flower leaf die
gold ink
sentiment stamp and scroll

Friday, July 29, 2011
FOR CINDY AND KEVIN ECHTINAW (STAMPINGSCRAPPING.COM)
Just For Today
By Vicki Tushingham
Just for today I will try to live through the next 24 hours
and not expect to get over my child's death,
but instead learn to live with it, just one day at a time.
Just for today I will remember my child's life, not just her death,
and bask in the comfort of all those treasured days
and moments we shared.
Just for today I will forgive all the family and friends
who didn't help or comfort me the way I needed them to.
They truly did not know how.
Just for today I will smile no matter how much I hurt on the inside,
for maybe if I smile a little,
my heart will soften and I will begin to heal.
Just for today I will reach out to comfort a relative or friend of my child,
for they are hurting too,
and perhaps we can help each other.
Just for today I will free myself from my self-inflicted burden of guilt,
for deep in my heart I know if there was anything in this world
I could of done to save my child from death,
I would of done it.
Just for today I will honor my child's memory
by doing something with another child
because I know that would make my own child proud.
Just for today I will offer my hand in friendship
to another bereaved parent
for I do know how they feel.
Just for today when my heart feels like breaking,
I will stop and remember that grief is the price we pay for loving
and the only reason I hurt is because
I had the privilege of loving so much
Just for today I will not compare myself with others.
I am fortunate to be who I am
and have had my child for as long as I did.
Just for today I will allow myself to be happy,
for I know that I am not deserting her by living on.
Just for today I will accept that I did not die when my child did,
my life did go on,
and I am the only one who can make that life worthwhile once more.
REST IN PEACE LINDSAY
By Vicki Tushingham
Just for today I will try to live through the next 24 hours
and not expect to get over my child's death,
but instead learn to live with it, just one day at a time.
Just for today I will remember my child's life, not just her death,
and bask in the comfort of all those treasured days
and moments we shared.
Just for today I will forgive all the family and friends
who didn't help or comfort me the way I needed them to.
They truly did not know how.
Just for today I will smile no matter how much I hurt on the inside,
for maybe if I smile a little,
my heart will soften and I will begin to heal.
Just for today I will reach out to comfort a relative or friend of my child,
for they are hurting too,
and perhaps we can help each other.
Just for today I will free myself from my self-inflicted burden of guilt,
for deep in my heart I know if there was anything in this world
I could of done to save my child from death,
I would of done it.
Just for today I will honor my child's memory
by doing something with another child
because I know that would make my own child proud.
Just for today I will offer my hand in friendship
to another bereaved parent
for I do know how they feel.
Just for today when my heart feels like breaking,
I will stop and remember that grief is the price we pay for loving
and the only reason I hurt is because
I had the privilege of loving so much
Just for today I will not compare myself with others.
I am fortunate to be who I am
and have had my child for as long as I did.
Just for today I will allow myself to be happy,
for I know that I am not deserting her by living on.
Just for today I will accept that I did not die when my child did,
my life did go on,
and I am the only one who can make that life worthwhile once more.
REST IN PEACE LINDSAY
Sunday, April 17, 2011
MY CRICUT IMAGINE DUST COVER

I needed a cover for my Cricut Imagine . On the Custom Crops website there is a free Cricut Expression Cover sewing pattern I printed the pattern pieces then instead of taping the pieces together as per instructions I used some painters tape and taped the pieces to the top of the Imagine at the appropriate ends and with the fold line acrossed the middle of the top of the imagine I took sheets of copy paper and filled in the gaps to add length ...with the side pieces its just a matter of bringing the fold line back aprox. 4 inches...
I used a Damask print fabric for accenting and the main piece is a tannish colored denim....
I used an embroidery design from Embroidery Library and used colors accordingly...it was the very first time
for splitting a design for me so I kinda goofed a little bit but think I recovered ok with my little red button
for an "a"........hope you like it Jodi
Monday, April 4, 2011
MY NEW CRAFT ROOM FINISHED FINALLY!!!!!

AND I ABSOLUTELY LOVE IT !!!!!!!!
DETAILS DETAILS
ALL of the black furniture I painted..(painstakingly)...
upcycled old dining room table that I mounted only half
to the wall.
Computer desk bought on craigslist for $75 painted black
under desk there is a cabinet with drawers
where I am keeping my embossing supplies
and also my stash of Just Rite stamps
2 Dining room chairs painted black and bought damask cushions
at Big Lots for $10 each
artwork done by : Joshua Hendry ....my son in law.I like the movie
A Nightmare Before Christmas and he drew this for me for my
christmas gift
I had all of the storage drawers already ...
black cabinet under picture frame upcycled part of the old
entertainment center that we took out of the livingroom..painted black
Damask picture frame my husband found out scrapping
still has tags and stickers from Ikea
shelf above half table bought at resale shop for $1
rugs bought at Family Dollar 2 small 2 large at the time of purchase they
had a deal going with rugs buy one get one half off so spent $15 on rugs saved $7.50
***fur babies came with the room***
Sunday, February 6, 2011
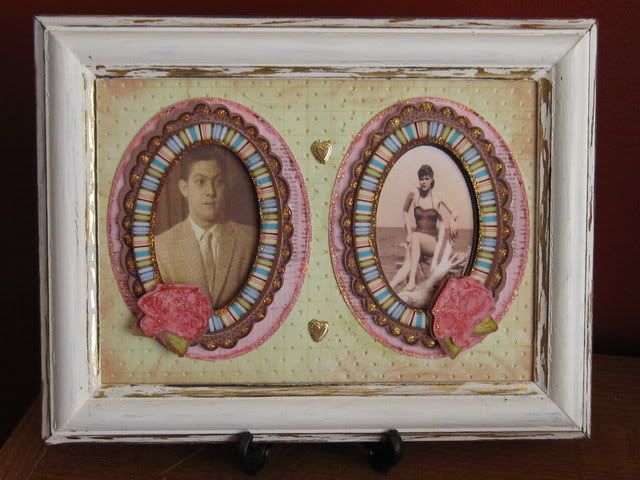
MOM AND DAD'S ALTERED FRAME

I am having an awesome time with my Cricut Imagine and altering dollar store picture frames.
This frame is 5x7 it was brown with gold on the edges
I rag painted it white and then with fine sand paper I sanded lightly on the gold edges
so it would look old and antiquish.
Using Imagine More Cards I cut the pretty picture frames at 3 1/5 inches
in layers..I used Lace Stickles around the edges of the frame
and as dots on the scalloped frame..and also on the roses.
The paper is also from Imagine More Cards and embossed
with swiss dots and antique red ink.I used 2 gold heart brads and
liked the way it looked without the glass.
Instructions for antiquing the picture frame:
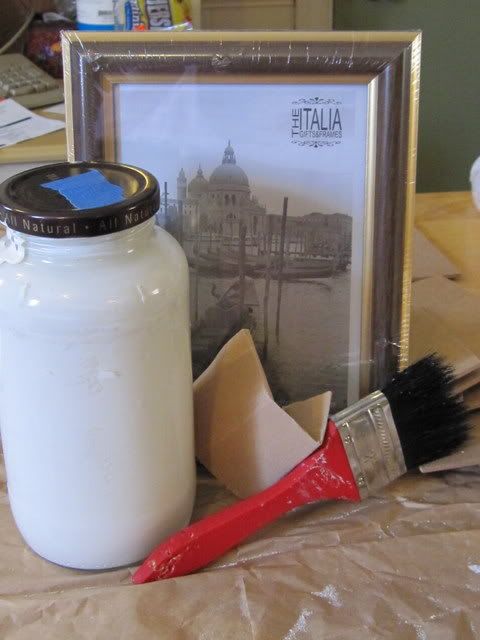
Supplies needed:
picture frame size your choice mine is 5x7
paint color of your choice I used white
paint brush
paint brush
fine sand paper I used p100
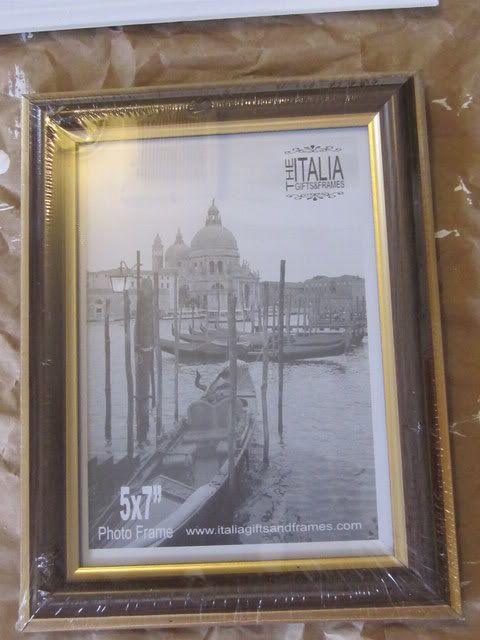
my frame is 5 x7 brown with a gold trim I got it at the dollar store
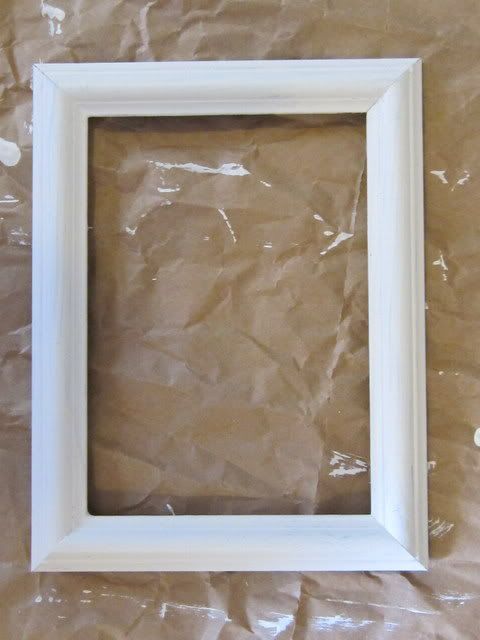
paint your frame with a nice coat of paint to cover
some streaking is ok because in the end you want
it to look old

I mainly just wanted some of my gold to show through
so I used sand paper and sanded some paint off the gold trim.
You could however use a darker base coat such as black or brown
and use a crackle coat then your top color to have another
amazing antiqued effect.
At this point I assemble my Cricut cuts and embellish as I see the need..
this project had an amazing effect with old pics of my parents when they were 17 years old
hope this info is helpful for you Happy Crafting
Wednesday, February 2, 2011
ALTERED DOLLAR STORE PICTURE FRAME

I made this for a challenge over at the Cricutdemowa yahoo group...had to use Imagine and Imagine cartridges...
I took a dollar store picture frame and rag painted it white...used snow angels cart for pink paper for covering mat Imagine More cartridge for corners butterflies and the little flowers on letters...font is from Nursery Rymes cartridge and stickeld with Sequins stickles with shadow of yellow paper from Imagine More cartridge...
Subscribe to:
Posts (Atom)